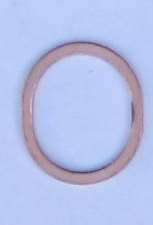
The first type 4 engines used oval, copper gaskets where the heater box/header pipe mates with the cylinder head, commonly known as round port exhaust. This was changed in 1978 to what’s called square port exhaust.
The round port gasket looks like this …
And square port gaskets look like this …

The common belief is that the square port variety is better than the round port because lot of round port vehicles have exhaust sealing problems at the hard copper gasket and it’s nothing but hassle – they commonly leak and the square port gasket looks typical and squeezes and seals nicely upon installation and they rarely leak. That’s only partially true but over time, square port gaskets compress and due to shifting from heat and vibration, the slowly erode away and get thinner and eventually do leak. The round port variety can be used over and over again and will seal forever with occasional maintenance tightening if installed correctly. And new round port heads for 1.7 and 1.8 engines from AMC have bigger intake valves than new 2.0 AMC heads – both the round port and square port varieties.
Notice:
If you have a nut anywhere on the exhaust system, particularly at the cylinder head, and you have a nut where it seems it’s so tight you’re afraid it is going to break a stud and it just won’t move, STOP!! The last thing you want to do is break any exhaust stud off in the head. You may never be able to fix it and end up needing a NEW HEAD simply because of one broken stud. So you end up spending a couple days and few hundred dollars to put ONE NUT ON. Don’t break a stud!!
So, whenever in doubt, rather than risking a broken stud, heat the nut up red hot with a torch. It will likely come right off. This simple step can you save your hours and hours of work and plenty of $$.
Realize broken stud repair is not a “repair”, it’s an art and it takes long time to learn how to do it so avoid having to learn at all costs. Every time, anywhere on any vehicle, this simple step can save you a lot of anguish. Works great around the house too, like when plumbing. It could save you a call to the water company come turn of the main before the street is flooded. I call my oxy/acetylene my “hot wrench” and I use it all the time.
The key to making an exhaust system bulletproof and trouble-free for the long term is proper installation from the beginning. This means proper gasket installation and nice flanges throughout, particularly on fuel injected buses that have a literal can of worms of exhaust. All supporting brackets need to be there. Pretty easy to make these from metal stock if missing or broken. The alternator bracket needs to be in good shape and properly installed. This bracket can often be repaired at the heater box end simply by brazing or welding a washer to it to make up for a broken hole. Brazing washers over broken holes on any sheet metal parts on the engine is also a viable fix on any VW sheet metal.
The photo shows some repaired flanges for a 1978 bus. Cheaper than the Dansk repoductons and fit far better. Make sure you use nice, thick material for the flanges so they don’t bend on tightening. Realize this repair throws off the geometry. When I did this, I had an alignment problem on the left side front of engine – there was about a 1/2″ gap between mating flanges and the pipes would not bend to reach so I made a spacer – really just another flange – to fill the gap with a gasket on each side. Worked great
 .
.
When evaluating your exhaust system, specifically on a fuel injection bus system, look for nuts that have backed off and at the gaskets between the flanges. Look for rust, particulary in the crossover pipe and the inside of the 3 way connector. The pipe can be repairable but if the 3 way is rusty, you’ll need to use a new repro – Dansk. You’ll also need an appointment with the machine shop because the flanges on this product are far from flat and use as is will result in an immediate leak. Regarding the gaskets, many of these systems have never been apart and the gaskets are often disintegrating – the asbestos in the middle between the two surrounding metal layers just goes away. If you’re doing engine repair, now is the time. Much easier to do it now than mess with it 6 months after the engine is in and the exhaust starts to leak.
When installing any exhaust pipes/mufflers/gaskets, etc, NEVER use locking nuts!! They often freeze to the nut/stud and often make it impossible to “maintenance” tighten in the future. Always use normal nuts and bolts – no locking nuts or “special brass exhaust nuts”. These do the polar opposite of improving things and can be expensive. Use flat washers under the nuts and bolt heads (no washers at all where the exhaust bolts to the head!). Apply anti-seize compound to all threads. Install everything loose before tightening anything at all and right before tightening, flood all metal gaskets with WD-40, then tighten starting at the heater box to head nuts then do all the rest.
If you have a exhaust studs at the head that have rough threads and the nuts bind or start, a die will not help as it won’t go on all the way and a die removes metal and can weaken the stud. You may need to fix up the end of the stud with a die (8X1.25 millimeter die is needed) but clean up the remainder of the threads with a nice new nut and lapping compound, and plenty of WD-40. Ease it onto the stud till it stops, remove, clean with brake cleaner and attempt again. Once you gotten this nut to move freely up and down the stud far enough so it actually will tighten the heater box pipes, save the nut just for this stud – it’s unique now, it’s got to go on this particular stud and no other.
Round port gaskets need to be prepped before installation or they will not form an effective seal. They need to be annealed – whether new or old and old ones work great it they aren’t damaged or worn thin from wiggling due to looseness.
If you try to bend a round port gasket, you can’t. They’re thicker than a penny, made of copper and without prep, they don’t have the malleability to conform to imperfections and form a perfect seal. All you need to do is hang them from something, heat them red hot, then drop them in water. After this, they can be easily bent by hand almost as if they were made out of lead. Put a couple drops of glue on them to hold them in position, apply anti-seize compound to the studs, spray the heater box flange/header pipe with WD-40, put anti-seize on the face the nut makes contact with and install. The slippery it all is, the better it works. You may need to tap with a hammer on the pipes to get them to slide over the studs far enough to start the nuts. Once started, tighten diagonally, and make them tight but don’t break anything. DO NOT USE WASHERS FOR THIS – JUST NUTS!
If you think your sealing problems require machining at the end of the header/heater box pipe, it’s not so. The most you’ll need to do to this surface is run file over it just to clean up any carbon deposits. A properly prepared round port gasket gasket will compensate for any irregularities.
They’ll never leak. Just check for tightness occasionally.
About studs:
Original heads (they say VW on them under the rockers) have what are called “interference fit studs”. This means when the stud was inserted at the factory, the diameter of the hole it screws into is a teensy bit smaller than the diameter of the stud. It makes them so they’ll “never” come loose and they seldom do. If one of these studs is unusable, you can try to remove it (double nuts tightened together) but it’s unlikely it’ll ever come out even with heating the surrounding aluminum. If that’s the case, you’ll have to break it off as close to the head as possible in order to be able to center punch well and initiate drilling properly. Best case is when it breaks off flush with the head. Do you best breaking it to obtain this condition. Now center punch it, use small drill bit for a pilot hole and continue with larger bits and drill until, if you’re lucky, you see the spiral of the remnant threads. Now run in a tap. It’s usually 9X1.25 but I think some were 8X1.25.
If you get lucky, you’ll gain the original threads and may be able to use a metric stud. If not, the best thing to do is go to a machinist you help you determine the correct SAE tap to use because going to metric will require more drilling whereas than using the existing. In other words, there’s an SAE size that’s bigger than 9 mm (what you have) but smaller than 10 mm (where you’d need to go with metric). What you want to do is tap a hole that will enable you to use the tap size closest to the hole you already have and not drill it any bigger in order to NOT put in a stepped stud or a helicoil (which will require drilling the hole bigger than really necessary) and this is not going to be metric, it’s going to be an American thread – SAE. If you go to 10 millimeter for stripped 9 millimeter stud, you’re not going to have much aluminum left around the stud and it could easily fail. You’ll need a proper stud and or you may need to use an SAE bolt cut it down to size. If you best size for the hole diameter is too big to go through the exhaust flange hole, drill the hole a bit bigger – it won’t be much. I did this repair long ago but you’ll have to find out he best sizes for yourself regarding tapping the hole in the head.
If you have AMC heads – brand name AMC facing the ground and visible just below the valve cover looking up from planet earth, the studs are not interference fit but due to the heat, they can get very tight and not necessarily removable even with heat the surrounding material. They are 9X1.25 on the head end. If you have a problem with these, proceed as you would with the
Tags:air cooled, vw repair
This entry was posted on Thursday, May 23rd, 2013 at 7:17 pm
You can follow any responses to this entry through the RSS 2.0 feed.
