Wow. Those VW engineers – every time they improve something, they create another problem. They add lights so they add wires. They add cookies, you don’t get any milk. And sometimes they drill a new hole in the engine case and you get more oil light on. I don’t know what they were drinking that night.
I built an engine for a 1977 bus. I put the engine in the bus. I drove it. It ran great. 50 mile test drive. Mostly highway miles at 60 mph. Then I went around a sharp turn rather slowly on a city street. The oil light flashed. I went down the hill and stopped. The oil light flashed. I checked the oil – it was full. I’d never seen anything like this on an engine unless it was real low on oil. I now realized why there was some rubber tubing on the dipstick – to lift the dipstick higher so with about 1/2 quart extra oil in the engine, the proper mark would still be the new “proper reading”. Because with the extra 1/2 quart of oil, the light seldom came on. Oh, and the oil light did not work previously – the owner didn’t think it had one. Hippie chick. Cute. Because of the remnant dipstick tube (plugged), I assumed this was a 914? engine case and needed the windage tray that all 914’s came with.
Then I built a Vanagon engine about a year later. Same oil light problem. Now I had to think – Vanagon’s never came with a windage tray. Realize this is an instantaneous lack of oil pressure at low RPM. The bus engine has been on the road for two years. The Vanagon one year. The bus engine, which I’m sure had this problem before I rebuilt it, had nothing wrong with the main or rod bearings. The only reason I did the bottom end was because if severely delaminated cam bearings. The bottom of the case was loaded with the debris. The cam bearings were damaged not from any oil pressure problem but because the assembler of the engine did not trial fit the cam and check for free rotation before assembly. The first thing that would suffer damage due to an oil pressure problem would be the rod bearings (imagine your a rod bearing spinning at 4000 RPM). The rod bearings were fine as were the mains.
The oil light problem is a design problem and it’s easy to fix …
Here’s the early type 4 case
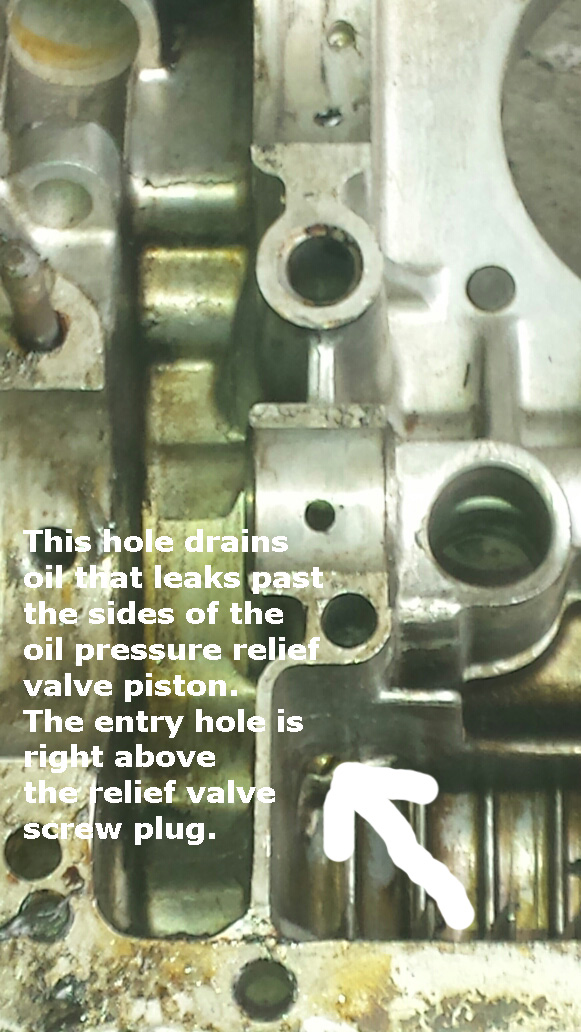
If you perform the repair outlined below, you can drill this hole with the engine assembled and it’s not an option, probably. You’ll need a long drill bit, easily obtainable in many hardware stores. 3/16″ or so. You may find it necessary to remove the pickup tube securing bolt to enable aiming of the drill bit. It’s not critical that it’s in a certain place or a certain size. Just make sure it’s in the galley shown in the above photo. Use grease on the bit to hold onto the cuttings. Don’t sweat it if you get a small amount of cuttings in the engine. The crankshaft is made of steel and many new car bearings are actually made of aluminum. Aluminum is soft, it can’t hurt anything and all bearings are designed (probably not intentionally but by default) to capture foreign material.

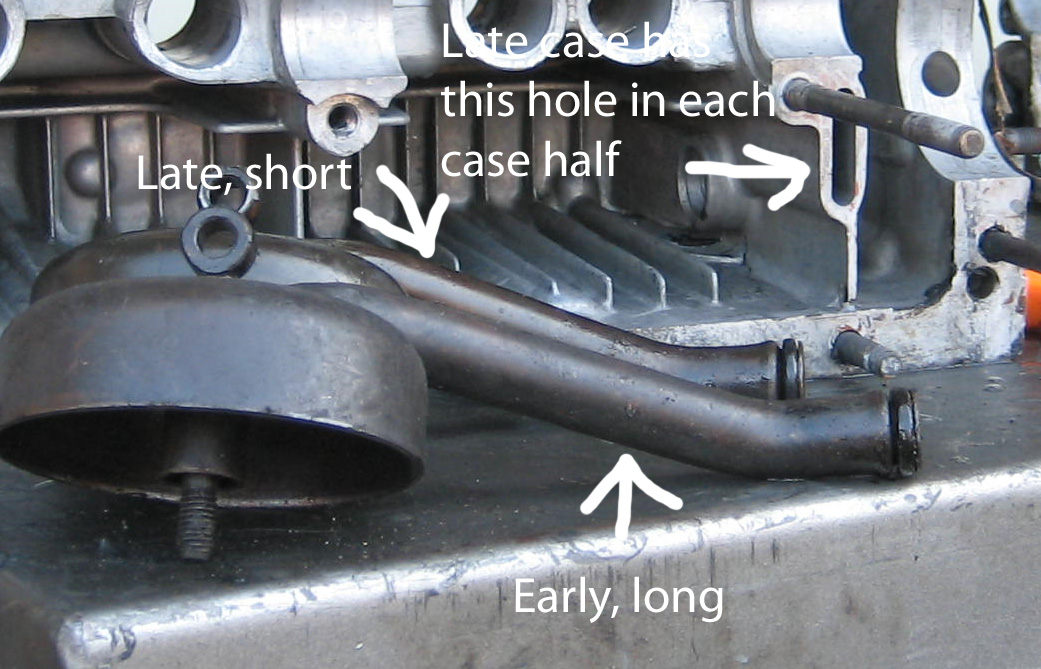
Here’s how the late case is different …
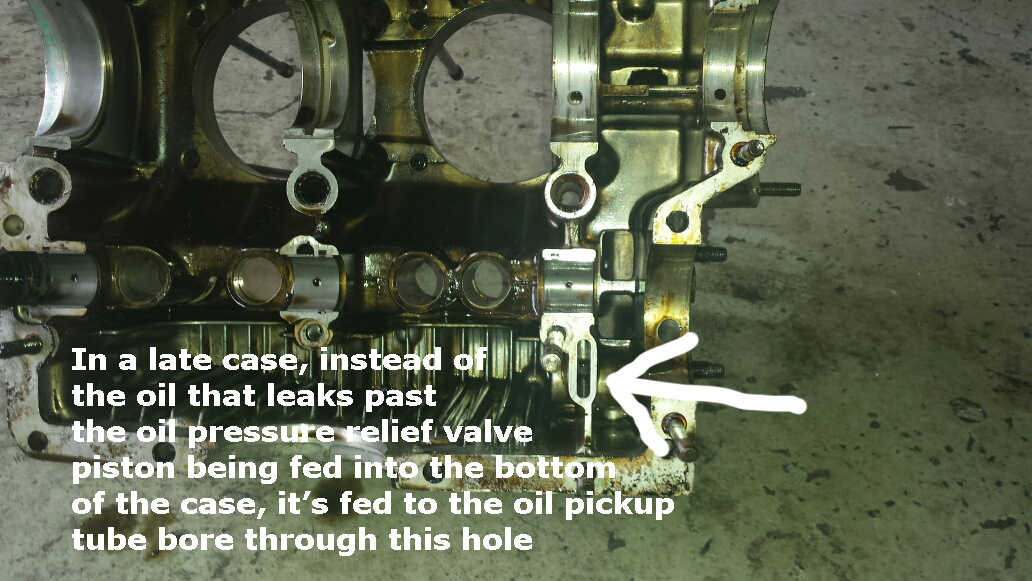
The reason my oil light comes on is because when the vehicle is braking, particularly on a hill, the oil flows to the front of the case. The oil pickup tube picks up oil at the screen and from this hole. If the hole on this side of the case doesn’t mate perfectly with the hole on the other side of the case and since the oil level at the rear of the case is lower when braking, apparently the oil pickup bore picks up air here and not oil as is should. It’s likely that even at higher RPM’s there is the potential for the oil to contain a certain amount of air even though the oil light is out and with a gauge, you probably won’t even be able to tell. A solution to this is to use the early, longer pickup tube. This will block the relief valve inlet hole and you’ll only suck oil. Drill a hole in the galley on the driver’s side of the case to enable draining as in an early case.
You can fix this problem without disassembly. You’ll need to remove the fan housing and some exhaust and you’ll need to remove the plug for the galley (drill a hole in it and pry), and obtain the following …
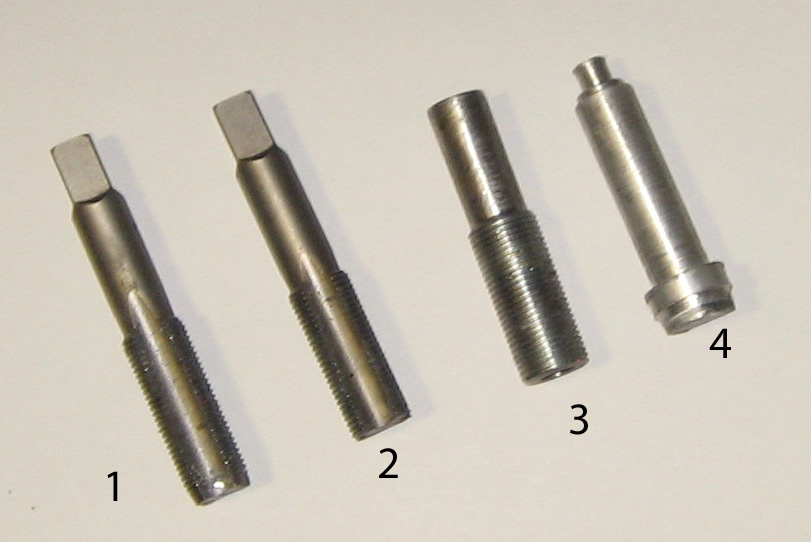
1. This is a 7/8 X 14 SAE tap.
2. Same tap as number one but with the taper ground off. No taper means the insert can go all the way in. This is called
a bottoming tap. First run the tapered tap all the way in, then grind the taper off to finish off the hole.
This is the insert. It’s simply a 7/8 X 14 bolt with a hole drilled all the way through. Hole is about the same size as the inlet hole on the oil pump. A little smaller or bigger is ok. Fluid dynamics – hole size is not that big of deal. Just not so big the insert will fail and not so small a bug can’t walk through it.
4. The larger end of this object will be the galley plug. Turn it on a lathe at the end of long stock, then cut the remnant off. It’s aluminum. It must pound into the galley hole like a nail. File the threads from the tap at this point to make the area nearly smooth. Use loctite and peen. It won’t leak and it’ll never come out.
When you finally run the bottoming tap all the way in, realize the insert will bind. You can’t let this happen. If it gets stuck and doesn’t plug the hole, you’ve accomplished nothing. That’s why the insert you see in the picture is so long – the additional length is a handle so I can run the insert in and out of the hole so test fit. I use lapping compound while screwing it in and out. This erodes the threads in the case so the insert screws in with zero resistance. That’s what you want. After you’re certain this is the case, cut the handle off and you’ve got your prepared insert. Wire brush any burrs formed from cutting to be sure it’ll still go in without any resistance.
Realize the insert must touch the pickup tube to effectively block the hole you wanna block but don’t screw it in so tight it puts any pressure on the tube. But try to make it so it does the tube because if the insert’s not in all the way, the hole won’t be totally blocked. So you make sure the insert can literally screw in all the way just by lightly jamming a standard screwdriver blade into it and turning it in all the way for it’s final installation. If it jams up halfway there you may end up with a headache so think and pay attention.
Use lots of loctite for this final step. Then damage the threads (technically, that’s called peening) behind the insert so it’s impossible for it to back out. Realize that even though this is potentially an imperfect fix since air may still be pulled in between the the threads or if you don’t think you’ve totally covered the hole, it’s way better than it was before and your oil light will not come on due to this poor design anymore.
This may be effective on Vanagon water cooled engines. And the way I look at it, any case with this original design can only be improved by doing away with this potential for a problem.
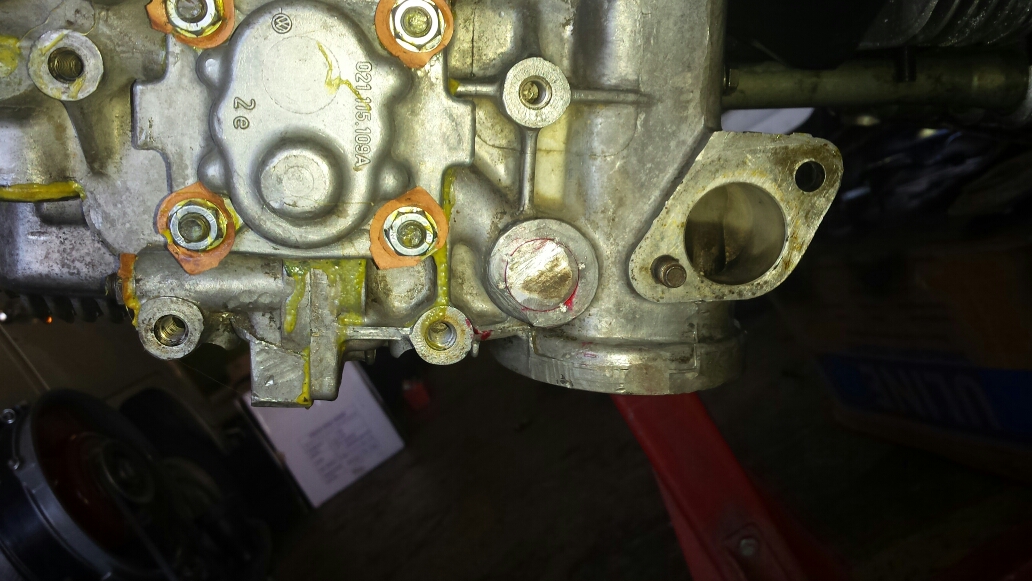
Lottsa glue? Prettier than any oil leak which you will have if you go for a pretty new engine today and a leaky oil pump in a few thousand miles. This is the galley plug from the picture above. I cut the end off and pounded it in like a nail. My oil pump gaskets are made from bug generator stand gaskets.
If you’re putting it together, using the early, longer pickup tube is good insurance. It fits perfectly and blocks the hole. Be careful when fitting so as not damage the o ring on the sharp edges of the hole you’re trying to block as your inserting it. Use WD-40.
This entry was posted on Monday, September 8th, 2014 at 9:51 am
You can follow any responses to this entry through the RSS 2.0 feed.
